About Me

My photo
IMAGINATION IS THE EYE OF THE SOUL Joseph Joubert. I am a mother of four...I still remember the smile that refused to go away for weeks after our daughters birth. To have a little girl appear after three sons seemed such a miracle. I have always enjoyed My Doll World, sharing it with Lara when she was little. Today I design knitted outfits for miniature dolls and enjoy every minute of it. The fact that the outfits are removable is what makes it so special for me. Using ever finer threads has opened so many MINIATURE DESIGN opportunities.

Monday, January 28, 2013

Peter Rabbit Pillow

This is the last part of the Peter Rabbit Quilt and Pillow tutorial. 

As you can see ALL DONE!!!


 First Round of Crochet


Second round of crochet


Preparation for making the puffing of the little square
I chose a green fabric that matched the colour of the last round of crochet, Also used the thread to do the hand quilting of each little square.


I press the first two sides of the backing


After stitching the first  three sides of the first corner square 
I inserted the cotton batting which is twice the size of the square then folded over, with the back of my crochet hook. I then wiggle it in place with a sewing needle from the right side.

Should you have any questions just put it in the comment section of this post.

This tutorial is for your PERSONAL USE and may not be made for resale.

Remember the internet is a small place.
It is amazing how much my customers have my best interest at heart ......

I sure hope you enjoy making this little project.

Sharon Chrystal


Peter Rabbit Quilt


Remember this quilt tutorial is for your Personal Use only


Crochet Stitches used for Edging

 The following videos show the stitches used.

http://www.youtube.com/watch?v=OqhaQQajt0U   single crochet stitch   (no wraps as you start) 1 chain extra does not count as first stitch
http://www.youtube.com/watch?v=o1txJLRPfuE  double crochet stitch (one wrap as you start)
3 chain extra to start - this replaces the first double crochet stitch
http://www.youtube.com/watch?v=i4xplEBGowg  triple crochet stitch (two wraps as you start)
4 chain extra to start - this replaces the first triple crochet stitch

Round 1
Using Maize thread (Colour 7-6054) make a round of sc (single crochet) completing the round with a slip stitch.
Round 2 
Continue with yellow thread make a slip stitch into the next sc, 5ch, 1dc into the same sc
*Miss 1 sc, into the next sc 1dc, 2ch, 1dc, rep from * till end of round join round with a slip stitch. Break off yellow thread
Round 3
Join in coral thread (Colour  7-2004) into a 2ch space Join in the tread a little further along as you don’t want to sew in all the start up and end threads of the different colours at the same spot. 6ch (counts as first triple crochet and 2 ch)
[1trp crochet, 2ch] twice into same 2ch space, 1 triple crochet
Into next 2ch space [1trp crochet, 2ch] three times, 1 trip crochet. Continue around the quilt. Break off thread
Round 4 
Join in green thread (Colour 7-5035)into 2ch space, *1sc, 4ch, 1sc into this 2ch space, rep for next 2ch spaces then 1sc into space between the groups of trip crochet (this is where I find it difficult to explain what I want you to do)continue around the quilt.
Round 5
Join in darker green thread  (colour 7-5001)  Into each 4ch space make 2sc, 4ch, 2sc continue around the quilt. If you have any questions please ask, as then I will know where I am going wrong in my explanation!!!!!


Enjoy and
Happy Knitting
Sharon Chrystal

Sunday, January 27, 2013

Peter Rabbit Quilt

Well I managed to complete the quilt last night.......

I so enjoyed the creativity of it all.

Peter Rabbit Quilt


 A pillow with 12 of the the squares would work well. 
Three squares up by four squares across.

Have put the brain in neutral for today and am crocheting a 
little mat in the same colours for next to the bed.

I will do a diagram of the crochet edge far easier 
for me to make you all understand the stitches.

After that I will do a little pillow.

Happy Knitting
Sharon Chrystal

Saturday, January 26, 2013

Peter Rabbit Quilt


I will have to check the crochet stitches that I used,
as I have used American terms in the past.

I did a little embroidery on the front and decided less was more...

The Peter Rabbit Quilt is taking a lot longer than I thought.
I am stitching around each square while listening to the book 
"The Name of the Wind" love tales of magic  

Each square is stuffed with a little cotton batting.
You need to leave the outer edge squares until last, as you will have to turn the lining in at the edges before they are stitched.

Can't say my stitching is very neat at the back, maybe have to do it differently as in knitting a back for the quilt.

Part Three


 Do you think it looks carroty enough.......I do!!!!

Just wondering now if it will drape over the cot or bed.

PLEASE click on the picture to see the quilt more clearly.

Enjoy
Sharon Chrystal


Friday, January 25, 2013

Peter Rabbit Quilt

 PETER RABBIT QUILT


I have managed to complete the sewing up of the squares and have started on the the crochet edging.


I am so happy with the edging as it looks a little like carrots 
with the green edging looking like the tops of the carrots.


I will give you the pattern for the crochet edging tomorrow
I plan to embroider some carrots in bullion stitch  onto the yellow squares.
Kind of enjoying this little bit of creativity for children.


ENJOY
Sharon Chrystal


Thursday, January 24, 2013

Miniature Knitting in the Studio


Over the last few weeks we have been discussing Mini Knitting on a 
Yahoo Group called MSAT Mini Dolls.

Realizing people would like a more doable project 
as well as a fun one to boot,
I thought I would share this project with you all.

This is what we in South Africa call the "Charity Square"
You will find needles and thread in a doctors waiting rooms and all you need to do while waiting for the doctor is knit a few rows.

The completed squares are collected then sewn into blankets
by volunteers and then distributed to various charities.

As the squares are knitted in the diagonal the cast on and cast off rows do not show as sides of the square.
I have had this idea on my mind for ever such a long time ...
On one of my coffee mugs there was a puffy quilted blanket 
used to tuck a baby teddy in his cot....
Always thinking it would make an easy knitting project.


I am going to incorporate knitting, crochet, sewing and quilting.
These skills seem combined some how!
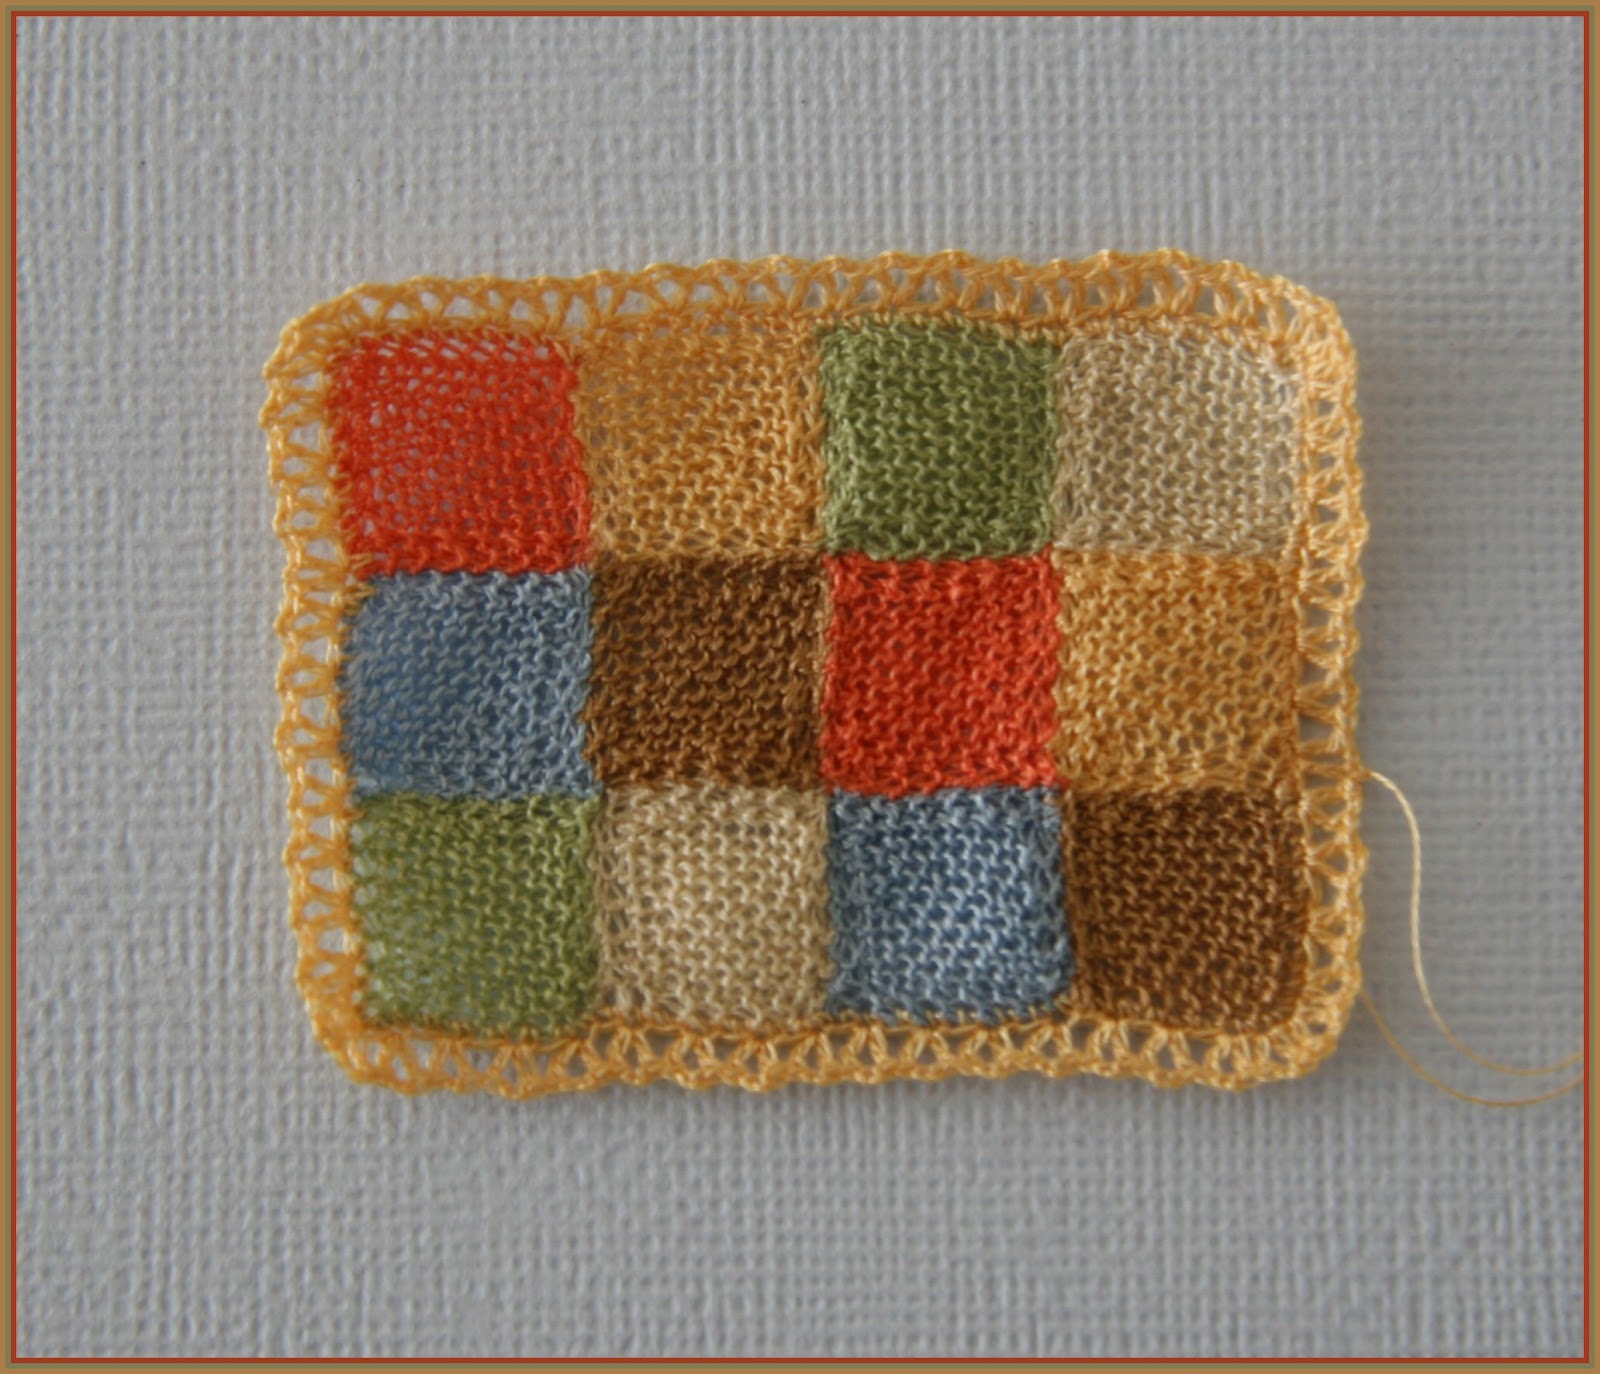
 So far I have managed 18 squares and sewn them together.

PART ONE


Because of the colours I have chosen the quilt has turned into

  Peter Rabbit Quilt 


Requirements

1 mm knitting needles
A very fine sewing needles No 12 Sharp
A No 10 straw needle for Bullion embroidery of the carrots
A piece of very fine cotton patterned if you like, I think I am going to use a piece of batiste that I have printed a pattern on myself. 
Venne 70/2 in the following colors, or six colours of your choice

7-2004 Coral   7-6045 Maize  7-5035 Green
    
7-6014 Beige   7-4060 Blue    7-6002  Coffee

As well as a reel of darker green for the crochet edge 7 - 5001 

You will need to make 48 squares in total, eight of each colour.
Please note that I have changed the number of squares to 48
Abbreviations
 
Inc           Knit twice into the same stitch
K2tog       Knit two stitches together
Sl1           Slip one knit wise
psso         Pass slip stitch over

Using Venne 70/2 and 1mm knitting needles in the following colour shades
 
Cast on 3sts

Row 1             Knit 1 row
Row 2             K1, Inc, K1  (4sts)
Row 3             K1, Inc, K2  (5sts)
Row 4             K1, Inc, K3  (6sts)
Row 5 to 13    Continue in this manner till you have (15sts) on your needle.

 Start row count at 1 again

Row 1            K1, K2tog, knit to end of row (14sts)
Row 2 to 12    Repeat row 1 till you have (3sts) on your needle
Row 13           Sl1, K2tog, psso pull thread through the stitch


As you can see I have sewn the pieces together in a special way I did not want their to be a definite diagonal stripe on the blanket.

When I have completed this section I will post Part Two

Enjoy!

Sharon Chrystal


Tuesday, January 22, 2013

Miniature Knitting in the Studio

Well Camille Allen's Sunshine 
has kicked around with no knickers on for long enough ...

He now has frilly knickers and three new hats....

Frilly Version of a Sailor Hat, not too sure if Dad's would approve.


Sunshine by Camille Allen


Why not have frills for little boys they are tiny babies for such a short while.

Unfortunately I cannot make a top for him , it is the way the arm is positioned and there is a little extra resin just under his arm...
I want to file it away but need to pluck up the courage in case I ruin him!!!

Enjoy
Sharon Chrystal

Thursday, January 17, 2013

Miniature Knitting in the Studio


Camille Allen's latest doll SUNSHINE 

dressed by Chrystal's Designs 


  Mom thought I would be a girl!!


Enjoy
Sharon

Monday, January 14, 2013

Miniature Knitting in the Studio

When a design turns out as you wanted it too really gives one a good feeling and all those nice things.


LUCY ROYALE

The outfit is off to live in Australia...

Please do note the frilled booties, those have really pleased my soul!

I made the petticoat in a contrasting colour so one can see the lace design a little better.


The pink petticoat under the dress


No petticoat at this stage.

Thursday, January 10, 2013

Pinterest Rugs

Over the Holiday period I had a lot of fun on Pinterest collecting pictures 
that please my soul. Pinterest shows you the link to many websites that one can browse...discovered so much. Now everything is in one place easy to find.


Found a site 
"Rugs Done Right" 

and saw the picture of a rug I particularly favour....


This one goes really well with my baby room, 
but I want to make it really big.


Also found a blog where the lady told you how to print onto fabric on your home computer now I can't find the link anymore, I get so mad at myself.

Should have added it to the Pinterest Rugs Board.
A very clever idea ...
when she wanted to put the spray glue onto her piece of card 

a cardboard box was used to contain the glue spray..

Such a "clean" way to do it.....

If you go to this link


you will see other rugs I have found and maybe you can print them for your own personal use.

If you want them a little bigger you can paste them onto a word document to do the adjustment in size.


I rather favour this one for a kitchen or sun room.


Love the green shades in this one also good for a sun room.
In fact I could have this one in my studio....


Not too sure about the pink edges in this one think I should doctor it in Photoshop something new to learn...

I am going to load up the various carpets I want onto a flash drive and take them to my local printer.
Fabric already attached to a piece of cardboard in hand 

Just to see how they manage it.
They have the larger printers.


Have fun.
Sharon

Wednesday, January 9, 2013

Start of a New Year

Hope you all had a wonderful Christmas and New Year

Wish you all that you wish yourselves and many many mini's.

Thank you to all the new followers you are all most welcome.

I have been productive even though my doll from 

Camille Allen has not arrived as yet.


I did the designing using the Sean doll and am thrilled with the result.


I won't be releasing this as a pattern 

The pattern will be kept for my personal knitting orders.

I also got to making a crib turned out rather frau frau but not to worry. 


 I bought the carpet on Etsy!


Just take a look at the little cat how adorable is that, 
My friend Ana Esteves gave her to me.

The very first cat she made after coming back from her classes with 
Kerry Pajutee

I felt really special!
Thanks, thanks, thanks Ana.